Lace front vs lace closure wig

Lace front vs lace closure wig

Whether you use hairpieces for fun or convenience or out of necessity, choosing the right one is the key to helping you look and feel gorgeous. Many people wonder about the difference between lace front vs lace closure hairpieces and which is right for them.

The Difference Between Lace Front vs Lace Closure

There are important differences between lace front and lace closure hairpieces. The right hairpiece for you will depend on your goals and your personal preferences.

Lace Front

The ever-popular lace front wig is versatile and can look very natural when done right. The name lace front comes from the sheer lace-like material covering the front of the wig. This piece of fabric acts like a natural hairline and helps the wig blend in with your head and look as though it is growing from your scalp.

The lace is also breathable, which makes these wigs more comfortable to wear for longer periods of time or in warm areas like Atlanta. Lace front wigs vary in quality, but you can style most of them just like you would your real hair. You can also change the part and try out different hairstyles and looks.

You may need to modify your lace front wig by plucking the hairs for a more natural hairline or by carefully coloring the lace to match your skin tone.

Lace Closure

For those looking for an even more natural finish, lace closure may be the way to go. These are smaller hairpieces, usually measuring 4 inches square or so, that you can use to close off a wig or weave. It’s essentially a cap on the top of your head that blends seamlessly into the rest of your hair. Most people cannot tell you are using a lace closure hairpiece.

The downside to lace front vs lace closure pieces is that the latter aren’t as versatile and you can’t change the part.

How To Choose Between Lace Front vs Closure

A woman looks into the mirror, deciding between closure vs lace front.

When deciding between lace closure vs lace front hairpieces, take your preferences and needs into consideration.

Hairstyle

If you are someone who likes to change things up often and try out new looks, then a lace front is likely the way to go, as it is more versatile when it comes to styling.

Part

People who always use the same parting style can safely choose a lace closure for a polished, realistic look.

Comfort

A lace front is more breathable if you plan on using the hairpieces for an extended amount of time. In the hot and humid Atlanta climate, a lace front rather than a lace closure is a good option for comfort.

Where To Buy Lace Front or Lace Closure Hairpieces

Either lace front or lace closure hairpieces offer you versatility and a flawless look. The right one for you comes down to your personal preferences. If you are looking for high-quality hairpieces or you’d like help with selecting or installing a hairpiece, Hair Fetish Atlanta Salon is here for you. Book an appointment today.

Long and short curly wig hairstyles.

Long and short curly wig hairstyles.

Elevate your style with a curly wig, an easy way to achieve natural-looking, flawless curls. They are versatile and perfect for any occasion, and they have endless styling options. These curly wig hairstyles are sure to have you feeling confident and beautiful whether you’re with your girlfriends for a night out in the ATL or catching up on your shopping around Lenox Square Mall.

Frontal Curly Wig Hairstyles

A frontal wig has a strip of lace running from ear to ear that covers the entire hairline. The lace blends to your hairline and natural skin, and the ability to cover the front area of your head means you can style the wig like you would your own hair. There’s never a boring hair day with so many styling options, and a great hair salon has the services you need to achieve the look you want.

Braided Styles

With longer curls, you can create a number of braided styles. Start by pulling the lace front back into a ponytail and braiding the loose hair down to the ends. If you’re looking for extra drama and sass, style your hair in an ear-to-ear cornrow braid. You can also do a comb-over with box braids that leave room for the curls to shine. This is a stylish option when you want more sophistication to your look.

Half-and-Half Styles

Since the lace covers the full front of the head, you have several options with half-up and half-down styles. You can pull just the front hair back into a ponytail and leave the back loose to highlight the curls. Add extra flair and drama with a bejeweled hair clip or other fashionable accessory at the top of your ponytail.

Low Styles

A higher ponytail is a go-to in curly wig hairstyles, but depending on the occasion, you may need something less sporty or casual. A low ponytail is chic, especially when you gather the hair at the base of the neck. Leave some volume around the front of the head to soften the look or let a curl or two escape from around the ears. Low styles are easy to pull off with a frontal wig since the lace is at the front and won’t show wafts at the nape of the neck.

Short Curly Wig Hairstyles

Short curly wig hairstyle.

Working with a short curly wig offers plenty of fun and drama to add to your style. From classic styles like a bob to adding bangs, your shorter curls can still be the star of the show in these hairstyles.

Pixie Side Braid

The curls on a shorter wig will frame your face, but this side braid will draw attention to your eyes. Start by parting your hair on any side you want. From there, take several strands of curls on the larger side and weave them into a braid. Secure the braid with a hair tie before wrapping the braid to the other side of your head and securing it with pins or a clip.

Middle Part With Clips

For another dramatic look, brush out the hair well before parting it down the middle of your head. From there, secure each side with bold hair clips parallel at the edge of your eyes. You’ll want to make sure the top of your wig is smooth and sleek to create the right effect.

Bob With Bangs

Nothing frames your facial features more than a short bob of gorgeous curls. Add in bangs and the look is complete. Box braids might look a little stiff, but small, curly tresses are a different story. The bangs can soften the look and help your eyes stand out. Another option with a bob is half cornrows. With a bob-length style, the half braids and half curls create a boho chic vibe that is sure to draw the eye.

Long Curly Wig Hairstyles

Long curly wig hairstyle.

Curly hair commands attention when walking into a room. With long curly tresses, you can experiment with top knots and buns or let your curls flow long and loose.

Side Part

A side part is a chic and easy way to bring drama to your appearance. A side-part combover with just a few strands of curls is one option, or create a deep part by increasing the amount of hair you comb over. A complete middle part can have a similar effect.

Updo

If you want a gorgeous, elegant style for your hair, an updo is ideal. It creates a flattering profile for formal events, and it isn’t hard to achieve. Develop the look by using a loose French braid swept into a full, messy bun. Pull out a curl or two to soften the framing around the face.

Pigtails and Buns

Long hair looks great up or down, and you can use pigtails and buns to create height with your hair. Curly wig hairstyles that are great for casual use include double loose twisted buns with pigtails on the front of the hair or a loose middle part with low pigtails.

Hairstyles for Curly Wigs To Avoid

If you have a frontal wig, there are a few hairstyles that won’t work well. Since lace fronts only have lace around the front perimeter, you wouldn’t want to try a high ponytail, as it might expose the wefts in the back. The same is true of straight-back cornrows or space buns. The wefts of the wig are noticeable when the hair is parted straight down the middle, and there is no lace in the middle of a lace front wig.

If these are hairstyles that you can’t afford to go without, a full lace wig is optimal. With lace through the whole wig cap, you can part the hair any way you want, creating a range of natural-looking styles.

Experiment With Curly Wig Hairstyles

You can create the perfect look for any occasion with the professional help of Hair Fetish Atlanta Salon. From our lace or wig installations and recommendations on curly wig hairstyles, we want you to feel beautiful, bold and confident. Book an appointment to find a fun and stylish way to express yourself and create the perfect look.

What to know about wig repair.

What to know about wig repair.

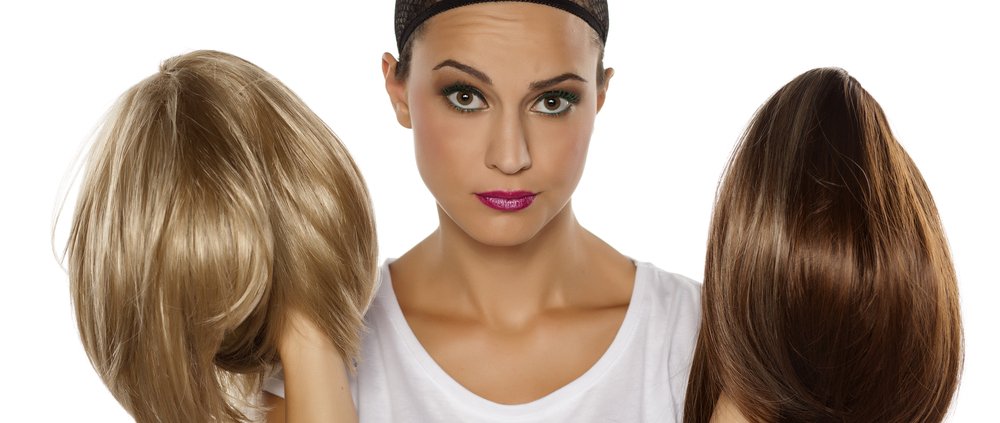
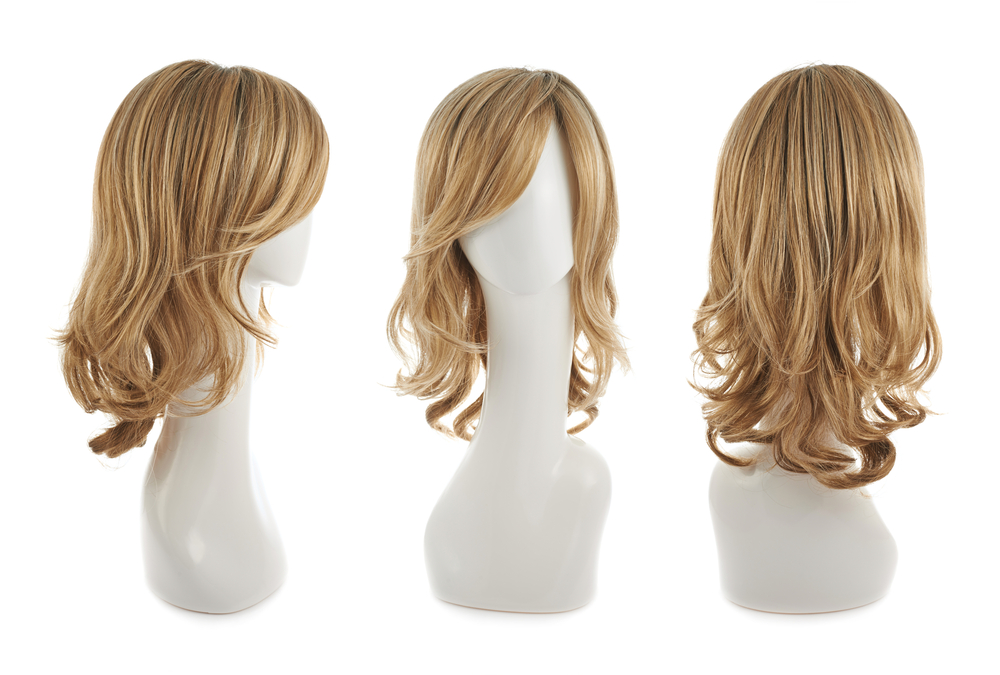
Both synthetic and real hair wigs can create a gorgeous new look. However, no wig lasts forever. Wig repair services can restore the appearance and functionality of a wig that is worn out or damaged. The type of repair you need depends on what kind of wig you have.

Why You May Need Wig Repair

Over time and with extended use, wigs start to lose their style and shape. The more common issues needing attention include:

  • Holes or tears
  • Thinning or balding areas
  • Worn-out lace frontals or closures

Natural wear and tear contribute to the need for repair services, but improper maintenance can cause you to need repair help more quickly. Though there are plenty of DIY tips for repairing a wig, it’s best to trust professional salon services to fix balding frontal wig concerns.

Damage From Dryness

There is the potential for both synthetic and human hair wigs to lose some of their style and shape as the strands start to dry out.

Synthetic Wigs

Synthetic wigs don’t have the moisture content of human hair, and they also have added chemicals that cause static cling. This influences the styling of the wig. To fix dryness with a synthetic wig, you should treat the wig with a quality conditioner or softener specifically made for synthetic hair.

Hair softeners made for wig use contain a positive charge to rebalance the electricity of the hair. They also soften the strands and make them easier to comb.

Real Hair Wigs

Though they look more like natural hair, a lack of roots in the scalp means that human hair wigs don’t get the moisture needed to stay healthy. By regularly washing and deep-conditioning your wig, you can keep it easy to style and free from damage. It’s recommended that you wash your wig every 10 to 12 wears.

Damage From Stress

Your wig can get damaged from the stress it undergoes during styling, your daily activities and more. Color fading can be a problem due to intense sunlight exposure or chlorine exposure. Heat treatments, such as using a straightener to smooth out kinks, can damage a synthetic wig unless it’s heat resistant. It’s better to use steam to help straighten the locks on your wig.

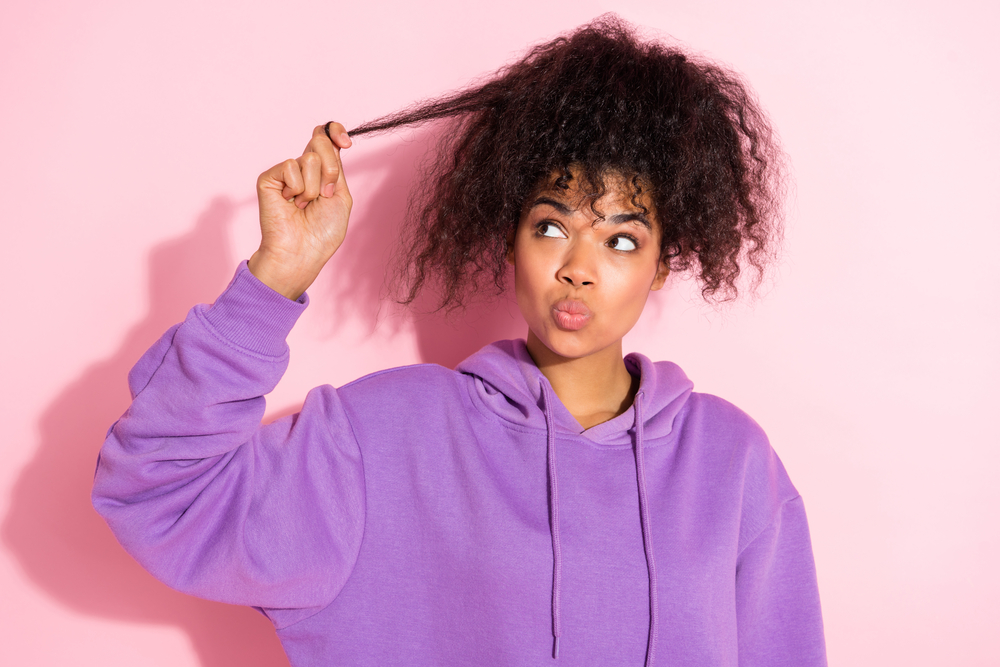
Damage From Dry Ends

Although dry ends won’t hurt you, they affect the look of your wig. Dry ends generally occur from heavy styling, as well as rough brushing or friction from sleeping without a protective bonnet. Solutions for dry ends include a short trim to remove the ends, but this can only happen a few times since the hair won’t grow back.

You can also add an anti-static product or detangler to the wig before you gently comb through the hair and remove any knots. Once you have the ends detangled, you can use styling treatment if it’s a heat-resistant wig.

How To Perform General Care To Prevent Wig Repair

Three hair pieces sit on mannequins, ready for wig repair.

Keeping up with the general maintenance a wig requires can help prevent serious damage and repair needs. If your wig is looking a little worse for wear, you can restyle it by patiently moving through these general care practices.

1. Detangle the Hair

You should detangle your wig before making any repairs. Use a special detangling brush and solution made for use with a wig, as they’re safer and gentler on the hair. Pin your wig onto a Styrofoam wig stand before applying the detangling solution, then brush it out.

Be gentle. Remember that if you are looking to fix balding frontal lace, pulling or combing aggressively will only make the balding issues worse.

2. Wash and Condition

Even when it’s tangle-free, your wig may show signs of dryness and frizz. Using warm water, wash your wig in a quality shampoo. You can immerse the hairpiece while gently rubbing the strands, but be careful not to create tangles or knots. Use a leave-in conditioner.

3. Air Dry

Don’t use a blow dryer when trying to revive your wig. Let it stay on the wig stand overnight to air dry. Brushing the wig out while it is still damp is ideal, as it’s easier on the hair.

4. Style the Hairpiece

Once you’ve taken these steps, you will be better able to see how damaged the wig really is. Styling your wig may leave it looking as good as new. However, if you are missing strands of hair or the lace is torn, you will need additional wig repair.

How To Repair Torn or Balding Lace Wigs

In some cases, the damage to the wig isn’t just to the look or feel of the hair. A lace wig can rip, necessitating a repair of the base material. It’s possible for strands to come loose from the wig and create thin or balding spots. The adhesive may also start to slip, requiring reapplication around the edges.

1. Prepare the Wig

Before you can repair the lace or replace missing hair strands, prepare the wig as described in the steps to restore its looks. Wash and air dry the wig, leaving it on a mannequin head overnight.

2. Repair the Lace

When you are ready to repair the wig, turn it inside out and place it back on the mannequin head. Using a small needle and strong thread, sew a small hole or tear shut. For larger holes or tears, you may need to use a patch. You can find a lace mesh or similar materials from a wig seller. Be careful about the material you use, as you want to ventilate air to the scalp.

3. Replace Missing Hair

Filling in hair along the lace base required a ventilation needle and holder. You also need hair bulk in the same color as the wig. This part of wig repair is time-intensive, as you should only sew a few strands of hair to the lace at a time.

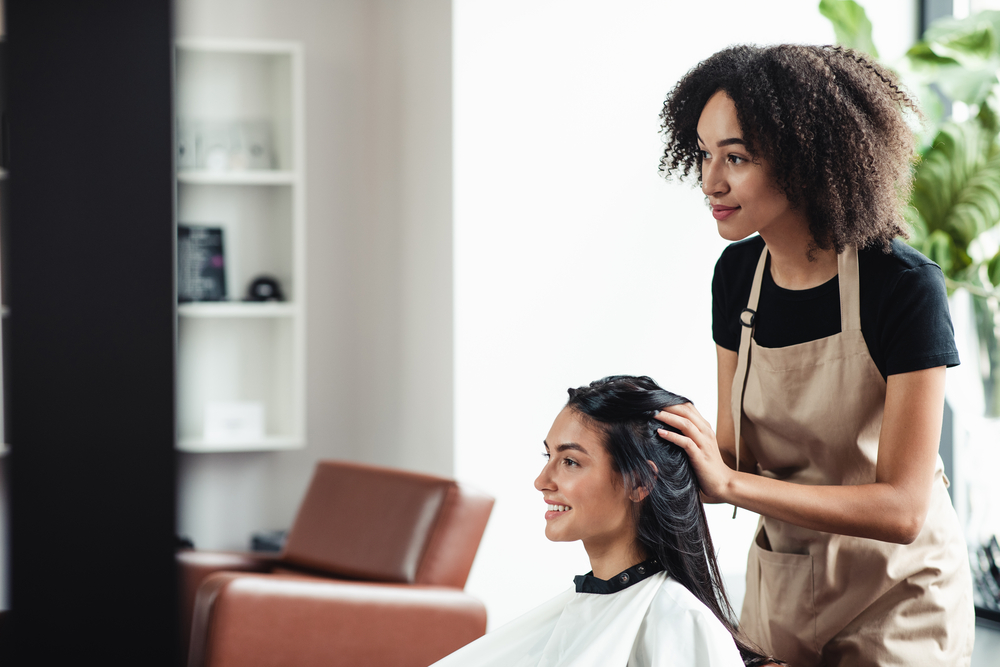
Turn to the Professionals for Wig Repair

Wig repair is best done by professionals.

While you can work at restoring your wig to a gorgeous style on your own, you can likely get better and more convenient results with the wig repair services from Hair Fetish Atlanta Salon. Book an appointment today and trust us to fix your hairpiece.

How long does a wig install last?

You put a lot of time and money into your wig install, so naturally you want to know: How long does a wig install last? Several things can affect how long your wig lasts, and you can improve the longevity of your install by following a few simple tips. Here’s what you need to know about keeping a natural-looking hairline and beautiful locks or curls.

How Long Does a Wig Install Last on Average?

The average duration of a wig install is about two to six weeks. After this point, you would remove the wig and then re-install it. The different materials used for making wigs and installation techniques all impact the length of time.

Wig Materials

What your wig is made of influences its longevity. Human hair wigs have a longer lifespan than synthetic wigs, often lasting over a year with the right maintenance and care. A synthetic wig might only last six months, and heat-friendly options have a shorter lifespan. The quality of materials impacts how long do wig installs last before needing replacement.

Installation Techniques

How you secure your wig on your head is another important factor in the lifespan of an installation. There are adhesive and non-adhesive options.

Wig Glue

Wig glue is an adhesive specially formulated for skin contact. These heavy-duty seals last between three to six weeks. The high-quality adhesive is both waterproof and sweatproof, improving the longevity of the bond.

Glue Spray

There are adhesive options that weren’t specifically formulated for use with wigs but are still commonly used by wig wearers. Got2b Glued Spray is a spray option for holding on a wig, but it typically only lasts for one week at a time before needing reapplication.

Wig Tape

Instead of glue, you can use special wig tape to secure the wig to your scalp. Typically, though, a wig install lasts for a shorter length of time with tape. While quality tape should give you two to four weeks of a firm hold, a lower-quality tape could allow your wig to slip as early as two weeks.

Non-Adhesive Options

Not everyone’s lifestyle or skin is right for adhesives, so there are wig installation options that don’t use heavy-duty tapes or glues. Wig grips, wig clips and adjustable straps will hold your wig on your head. However, these don’t always have the same security as a quality adhesive. On the other hand, you can easily adjust and remove the wig by removing the clips.

Sewn-In Wigs

Sewn-in wig requires someone to sew the wig onto your own natural hair in several areas using a needle and thread. This type of installation can last about four to six weeks before you need to remove it. When done right, the chances of any slippage are minimal, and sewn-in wig installs can stay in place for as long as three months.

The Personal Factors Impacting How Long a Wig Install Lasts

A woman exercising must take her activity level into account when asking how long her wig install will last.

In addition to the wig and installation materials, factors individual to you and your wig install make a difference in longevity. 

Installation Experience

The experience of the person installing your wig impacts how long a wig install lasts, whether you decide to do it on your own or turn to professional salon services. Any misuse of adhesives could weaken the bond and cause slippage, while improperly sewing in the threads can cause the wig to slip out prematurely. Wig clips can also come out unexpectedly if poorly anchored.

Lifestyle Factors

How active you are affects how soon your wig could start to slip. Sweating a lot can weaken the hold of an adhesive, but it also impacts the longevity of a sewn-in wig. In addition to loosening the hold, sweating can increase your risk of developing mildew or old growth and scalp irritation.

The Recommended Timeline for Wearing a Wig

Even if you take good care of your wig and invest in high-quality materials, there are several reasons why it’s not a great idea to leave a wig on for longer than six weeks:

  • Moisture gets trapped underneath the wig and causes mildew or mold growth.
  • An accumulation of scalp flakes and sweat leads to scalp irritations and skin damage.
  • Your natural hair can dry out, becoming brittle and dull.

In hot weather, these symptoms can get worse as sweating increases. A poor-quality wig or adhesive that slips can lead to rashes and itchiness as the wig moves across the head and mixes with sweat. Even if your wig looks great, you should remove it after six weeks for your hair and scalp health.

Tips for How To Make a Wig Install Last Longer

A woman gently combs her hair to make her wig install last longer.

While you shouldn’t have it installed longer than six weeks, you can help your wig look great and fit comfortably during that time. If your wig install doesn’t usually last that long, these tips can help you get more out of your next installation.

Be Gentle

Being rough on your wig will shorten your installation. Rough combing or yanking on the hair can lift up the edges of the piece and weaken the seal holding your wig in place.

Avoid Moisture

Air with too much moisture can weaken the effectiveness of the adhesives holding your wig in place. It can also contribute to mold growth or scalp irritation. You may have to prematurely remove the wig to stop these conditions. Scalp care is important when wearing a wig for long periods of time.

Avoid Tangling

By minimizing tangling, you can be more gentle when brushing out your wig. You should oil or moisturize your wig, avoid going to bed with a wet wig and protect your wig from friction by sleeping in a satin or silk bonnet.

Our Solution for a Wig Install That Lasts

With the professional wig install services from Hair Fetish Atlanta Salon, you don’t have to wonder how long does a wig install last. Our salon team uses quality materials and years of experience to provide a wig install that lasts for weeks. Book your appointment today for a gorgeous new look.

It takes practice to pluck a wig for a natural look.

It takes practice to pluck a wig for a natural look.

Wigs are fun to style and wear, and they offer a lot of versatility for your overall look. The key to getting the most out of your new hair is to make sure it looks like the real thing. 

It takes practice to learn how to pluck a wig, and the professionals at Hair Fetish Atlanta Salon can take you step by step through the process.

Expert Guidance on Plucking Wigs

There are several reasons a wig needs to be plucked before you wear it. Plucking is the process of thinning the hair at the front of the piece. This helps the wig blend in with your natural hairline more seamlessly.

When you find a great wig, you want it to look as real as possible. However, most wigs are made with a straight hairline. That’s a dead giveaway that it’s not your natural hair. During the plucking process, your stylist shapes the front of the wig so that it looks like it’s growing out of your scalp.

It makes sense to pay the experts at the salon rather than trying to do it yourself, particularly if you aren’t very familiar with how to pluck a wig. Everyone who has ever overplucked their eyebrows knows how upsetting that can be, and that’s just on a small part of the face. An uneven hairline is even more noticeable.

A quality HD full lace or lace front wig is an investment. Hiring a professional to guide and assist you through every step of the installation process is a smart choice.

How To Pluck a Wig: Step-by-Step

A salon professional anticipates how to pluck a wig for a client.

The first thing the stylists at Hair Fetish Atlanta Salon will do is take note of your natural hairline. You want it to blend in with the shape that is already there so that it doesn’t look fake. Once they have a clear idea of how it should look, it’s time to begin the plucking process.

1. Preparing the Hair

When learning how to pluck a wig, many people are so focused on getting the actual hair removal part right they may glide past the preparation phase. However, this first step is crucial for ensuring that the plucking is even and the lace and wig are protected.

There are several tools that most professionals use when plucking a wig:

  • Styrofoam or mannequin head
  • Straight pins
  • Rattail comb
  • Hair clips
  • Tweezers
  • Mousse (optional)

They start by securing the wig to the styrofoam head by pinning the lace to it. Another benefit of hiring seasoned professionals for this process is that they know how to proceed carefully so that they don’t tear the lace.

Before they begin to pluck, stylists comb out any tangles in the hair. They may also use a lightweight mousse to help smooth it out and make the strands more manageable.

2. Shaping the Front

The main goal when deciding how to pluck a wig is to match it to your hairline as closely as possible. There are many different hairline shapes. For example, if you want your wig to match your natural widow’s peak, your stylist will need to pluck enough strands to create it as part of the wig’s hairline.

Stylists section off the front line of hair and clip the rest out of the way. With the tweezers, they pluck a hair every few millimeters to thin it out. Once the first section is complete, they comb out another section and repeat the process through several layers until the wig looks like natural hair.

The stylist who plucks your wig can also cut small tufts at several points so that it looks like you have baby hairs along your hairline. This is not an essential part of the plucking process, but many people think it makes a wig look more natural.

3. Thinning the Sides

It’s not enough to just shape the portion of the wig that will sit at the top of your forehead. All the hair that frames your face needs attention so that it doesn’t look too bushy. The next step in how to pluck a wig is thinning the sides.

The technique is similar to the one used to pluck the top of the hairline. Stylists pluck by section, meticulously paying attention to the spacing between each hair that is removed so that there are no gaps. No one likes bald spots in a wig!

Once the process is complete, your stylist will comb through the wig to ensure that all the loose hair is fully removed. After a final once-over, your customized wig is done and ready to be installed.

How To Pluck a Part

How to pluck a part in a wig.

When you wear a wig, you can style it just as you would your natural hair. Although a defined part is not always included in the process of plucking a wig, it can be a flattering aspect of a number of hairstyles.

If requested, stylists can create a defined part in a wig during the plucking process. Once the hairline is shaped, they use the rattail comb to reveal the line where you want your part to be. Then they pluck hairs along the part every few millimeters to give it the look you desire.

It may not seem like they are removing a lot of hair when they pluck a part, but that’s on purpose. If they tweeze too many strands, it’s likely to create a bald patch that may be a clear sign that your hair is a wig. Trust their expertise, and you’ll have gorgeous locks that fall just the way you want.

Professional Help for How To Pluck a Wig

If you want to upgrade your look but don’t know how to pluck a wig, the stylists at Hair Fetish Atlanta Salon are here to help. Once our team hears your hair goals, they can recommend the best services to help you achieve them. To get started, create or log in to your online account to book an appointment.

A hairdresser prepares to do a frontal sew-in for a client.

A hairdresser prepares to do a frontal sew-in for a client.

Hair services can be confusing. For instance, there are big differences between a lace frontal, a lace front wig, a frontal sew-in, or a closure sew-in. Different kinds of frontals can also lead to different hair results. What is a frontal sew-in, exactly? Here’s a guide to the process.

What Is a Frontal Sew-In?

A frontal is a piece of hair stitched onto lace that is large enough to cover your whole hairline. Frontals come in different widths: 13 x 4 inches, 13 x 6 inches and 13 x 8 inches. Wider frontals go further back towards the nape of the neck and let you part your hair more deeply. There are also 360 frontal pieces that wrap around the entire head.

A lace piece in front blends with the skin to give the look of hair growing out of your scalp, similar to a lace front wig. A frontal sew-in is different from a wig because your stylist sews the frontal and additional hair bundles into braids individually. A frontal sew-in doesn’t use glue or tape like a typical wig install and only uses a needle and thread. If you have a high hairline, a frontal sew-in can alter your hairline to be slightly lower.

How Do You Get and Maintain a Frontal Sew-In?

A person shows off her braids as she prepares to get a frontal sew-in.

Here’s how a frontal sew-in works:

  1. The stylist braids your natural hair in cornrows.
  2. They fit the frontal piece to your head and cut it to match the size and shape of your hairline.
  3. With a needle and thread, the stylist sews the lace of the piece into the cornrows for a secure fit.
  4. The stylist sews in additional bundles through the back of your hair.

A frontal sew-in can last for six to eight weeks, but you should go back to the salon for repairs and touch-ups every two to four weeks. Over time, the lace can shift or break slightly. Covering your frontal with a scarf while you sleep can help it last longer.

What Is a 360 Frontal? 

A 360 frontal is a piece that wraps around the entire hairline in front, on the sides and around the back. With a 360 frontal, you can pull your hair up into buns with a natural-looking hairline and you need fewer bundles to complete the sew-in.

Is a Frontal Sew-In the Same as a Closure Sew-In?

Closures are similar to frontals, but smaller (only 4 x 4 inches in size.) Closures are faster to sew in and have less lace to maintain, but they only let you part your hair in the center or slightly to the side. Frontals give a bigger range of styling options because they cover the entire hairline.

Learn More About What a Frontal Is and Other Hair Questions

If you want to know more about what a frontal sew-in is or if sew-ins are better than wigs, a hair professional can help you decide. At Hair Fetish Atlanta Salon, we have over 10 years of experience making our clients’ hair dreams come true. Book an appointment with us to answer all your hair questions.

It's normal for your silk press to come out frizzy, so let's talk about ways to fix it.

Woman before and after hair treatment on color background

A silk press is a great look, but what if you get frizzy chaos instead of smooth, shiny locks? It’s not an uncommon occurrence, but fortunately, there are steps you can take to get that silky look you’re aiming for. Here’s how to fix a frizzy silk press to get results you’ll love.

How To Fix a Frizzy Silk Press

There are several reasons that your silk press may have come out frizzy. Excessive heat, improper technique, and humidity can all affect the outcome of a silk press. By addressing all of these problems, you’ll likely find the solution.

1. Washing and Conditioning

Before your silk press, it’s important to wash your hair so that it’s clean but hydrated. The shampoo should be sulfate-free, which cleans your hair more gently and leaves your natural oils intact.

Use a leave-in conditioner for extra hydrated locks, or you can apply and then rinse out a deep conditioning mask. This also helps prevent breakage and frizz. Distribute the product from the tips to the roots. You can leave the conditioning treatment up to half an hour on your hair before thoroughly rinsing.

2. Drying

Use a microfiber towel to dry your hair, and when it comes time to use the hair dryer, dry in small sections so that your hair dries evenly. You can also apply a heat protectant product before blow drying and flat ironing.

3. Sectioning

If you want to avoid figuring out how to fix a frizzy silk press, then pay special attention to sectioning. When you divide your hair up, make sure that the sections aren’t too big. The more hair you have to flat iron at once, the more likely it will come out frizzy or that you may have to go over it multiple times. This can cause crimp marks, heat damage, and frizz in the final product.

4. Ironing

how to fix a frizzy silk press

Take each small section and smooth it with a flat iron. Use slow, smooth moments. You may need to experiment a little with the temperature to find the sweet spot for your hair. Start with lower temperatures and slowly work your way up. High heat can also cause frizz, so the lower the heat you can use, the better.

5. Finishing the Look

The best way to finish a silk press so that it comes out well is to use an anti-frizz serum or another type of hair oil. This adds shine to your hair and helps to lock in extra moisture. There still may be some flyaway hairs, which you can keep in place with a light-hold hairspray.

How To Maintain Your Perfect Silk Press

Once you’ve achieved smoothness, you don’t have to worry about how to fix a frizzy silk press anymore. However, you will want to take extra care of your hair to make the look last longer. When you sleep at night, use a satin or silk scarf for your hair. You should also generally avoid washing your hair, except for the occasional dry shampoo. Don’t forget to use a heat protectant if you will be styling your silk press.

How To Fix a Frizzy Silk Press if You Don’t Have Time

If you don’t have time to figure out how to fix a frizzy silk press yourself, you can count on Hair Fetish Atlanta Salon for quality, affordable hair care. Book an appointment today.

A woman with a high ponytail stares into the camera.

A woman with a high ponytail stares into the camera.

A ponytail with weave provides extra length and volume to your natural hair. It’s a popular method if you want a fuller, longer ponytail look without waiting for your hair to grow. You can also make it as high- or low-maintenance as you wish, getting creative with the style. Look at the variety of styles you can do yourself or have a professional create for you.

4 Weave Ponytail Styles Without a Flat Iron

If you want a ponytail that blends with your natural hair, making it easier to maintain, styles that do not require a flat iron or other high-heat tools are likely your best option. If you just removed box braids and want a style that does not overwork your hair when it is too fragile for relaxer or heat styling, the right weave can create a fresh ponytail in any of these styles:

  1. Curly weave ponytails can have deep curls that provide volume and bounce or ringlets that offer a romantic, soft look.
  2. Wavy ponytails with weaves can have a relaxed beach vibe or loose waves for a subtle but chic appearance.
  3. Textured weaves create a look that works well with natural African hair textures.
  4. Faux locs ponytails use deadlock extensions pulled into a high or low ponytail or goddess locs to combine wavy ends with the traditional dreadlocked look.

These styles provide versatility without the need for heat and allow you to change your look while minimizing potential hair damage. When you see a professional for salon services, your stylist will walk you through the requirements for each look and help you find the right one for you.

4 Styles for a High Ponytail With Weave

How to make a high ponytail with weave.

High ponytails are among the most versatile styles. You can dress them up for a wedding or prom or keep them casual for an everyday look. Choose from these trendy or timeless styles:

  1. Bubble-high ponytails or pigtails create a fun look you can decorate with hair ties and accessories. This works well with textured hair.
  2. High-weave ponytails with volume look great with loose curls or a touch of waves. These are a nice choice if you want to get creative with different colors.
  3. Rapunzel braids require a ponytail with a long weave to add extra length that blends seamlessly into your hair.
  4. Natural slick-back ponytails are a classic look you can adjust to make them unique. You need a hairpiece close to your curl pattern, allowing you to attach it at the base where you tie your natural hair.

Keep in mind that when done wrong, a high ponytail can damage your hair at the scalp near the crown. Talk to a professional about the look you want and how to protect your hair from breakage.

5 Unique Weave Ponytail Braids

Ponytail braids combine the elegance and protection of braids with the volume and length you get from a weave. These styles use a unique spin on traditional braids:

  1. Feed-in braided ponytails use smaller braids to gradually feed into a thicker braid, adding extensions to give the ponytail more length and thickness.
  2. Fishtail weave ponytails split the hair and weave into two sections and intricately braid in a fishtail pattern. This creates a more detailed, sophisticated look.
  3. Triple braid ponytails divide into three sections, braiding each section separately before combining all three into one singular braided ponytail.
  4. Twisted crown ponytails twist or braid the front hair at the crown to form a halo. You then pull the remaining hair, including the weave, into a braided ponytail at the back.
  5. Box braids into a weave ponytail is a look you can change more often. Using extensions, create individual box braids and gather them into a high or low ponytail, leaving the ends loose or twisting into a larger braid.

These distinct styles capture attention and offer a harmonious blend of the traditional and modernity. With a basic understanding of how to do a ponytail with weave, you can make choices for your hair texture that keep it healthy.

How To Make a Ponytail With Weave in a Simple Step-by-Step Method

A straightener may be helpful in creating a high ponytail with a weave.

There are five simple steps for adding weave to a ponytail that change slightly to accommodate different styles:

  1. Prepare the hair. Ensure your natural hair and the weave are clean, detangled, and dry. You may want to straighten your natural hair, especially at the roots, to ensure a smoother integration with the weave.
  2. Section and secure. Divide your natural hair horizontally into two sections. The bottom section is from ear to ear, and the top area encompasses the remaining hair. Secure the top section with a hair clip to keep it out of the way.
  3. Attach the weave. Starting from one end of the weave track, align it to the base of the bottom section, near the nape. Use hairpins to secure the weave by inserting them through the track and into your natural hair. Continue wrapping the weave around the base, securing it with pins as you go, until the entire track is in your hair.
  4. Combine and secure the ponytail. Release the top section of your natural hair. Using a hairbrush, gently brush your natural hair and the weave together, ensuring a smooth blend. Once you combine both, gather the hair into a high or low ponytail and secure it with a hair tie.
  5. Finishing touches. To hide the hair tie and create a polished look, take a small section of the ponytail, wrap it around the base, and secure the end with a bobby pin. Then apply product to add shine and reduce any frizz.

Remember to take care of your natural hair and the weave by regularly cleaning and moisturizing. Your ponytail can last a long time with proper installation and maintenance from an experienced stylist and high-quality weave.

Book an Appointment for a Professional Weave Ponytail

A trained stylist can create a seamless style, blending the weave with natural hair and ensuring you walk away with a perfect finish. If you want recommendations for the best weave type, texture, and color to complement your features and preferences, opt for a professional to create your look. Walk out with longer-lasting results and reduced risk of damaging your hair. Book an appointment for a weave ponytail style at Hair Fetish Atlanta Salon today.

brown hair extensions

Hair extensions are one of the fastest ways to change your look. Some people may think all hair extensions are equal, but this couldn’t be farther from the truth! There are many considerations, from synthetic to human hair, different prices, qualities, and purposes. Choosing what type is right for you depends on how much you want to spend and if you plan on wearing them often or just once in a while.

Read more

A woman wearing a brown hair wig

Hair loss is a common problem that people face as they age. The best way to deal with it is through hair replacement options, such as wigs. However, modern hair wigs are quite different from traditional ones because they look more natural and blend in better with your hair. They also last longer than traditional human or synthetic wigs do. This article will explain what modern hair wigs are and how they can enhance your look.

Read more